
All-new Blink Video Doorbell Wedge Mount (Black): Simple Angle Adjustment for Better Coverage
Introduction
The All-new Blink Video Doorbell Wedge Mount – Black is a small but useful accessory designed for Blink video doorbell owners who need a better viewing angle than a flat mount can provide. Rather than changing how your doorbell functions, this wedge focuses on tilting the camera so it can better see visitors, packages, and the surrounding entryway. For many front doors that are recessed, off-center, or mounted on angled trim, this kind of bracket can make the difference between seeing a full person and only half a frame.
If you already own a Blink video doorbell or are planning to install one, this wedge mount is intended to give you more flexibility in positioning without requiring major changes to your doorframe.
Note: At the time of writing, the mount is available for around $7.99, but prices can fluctuate over time.
Setup / Getting Started
What’s in the box
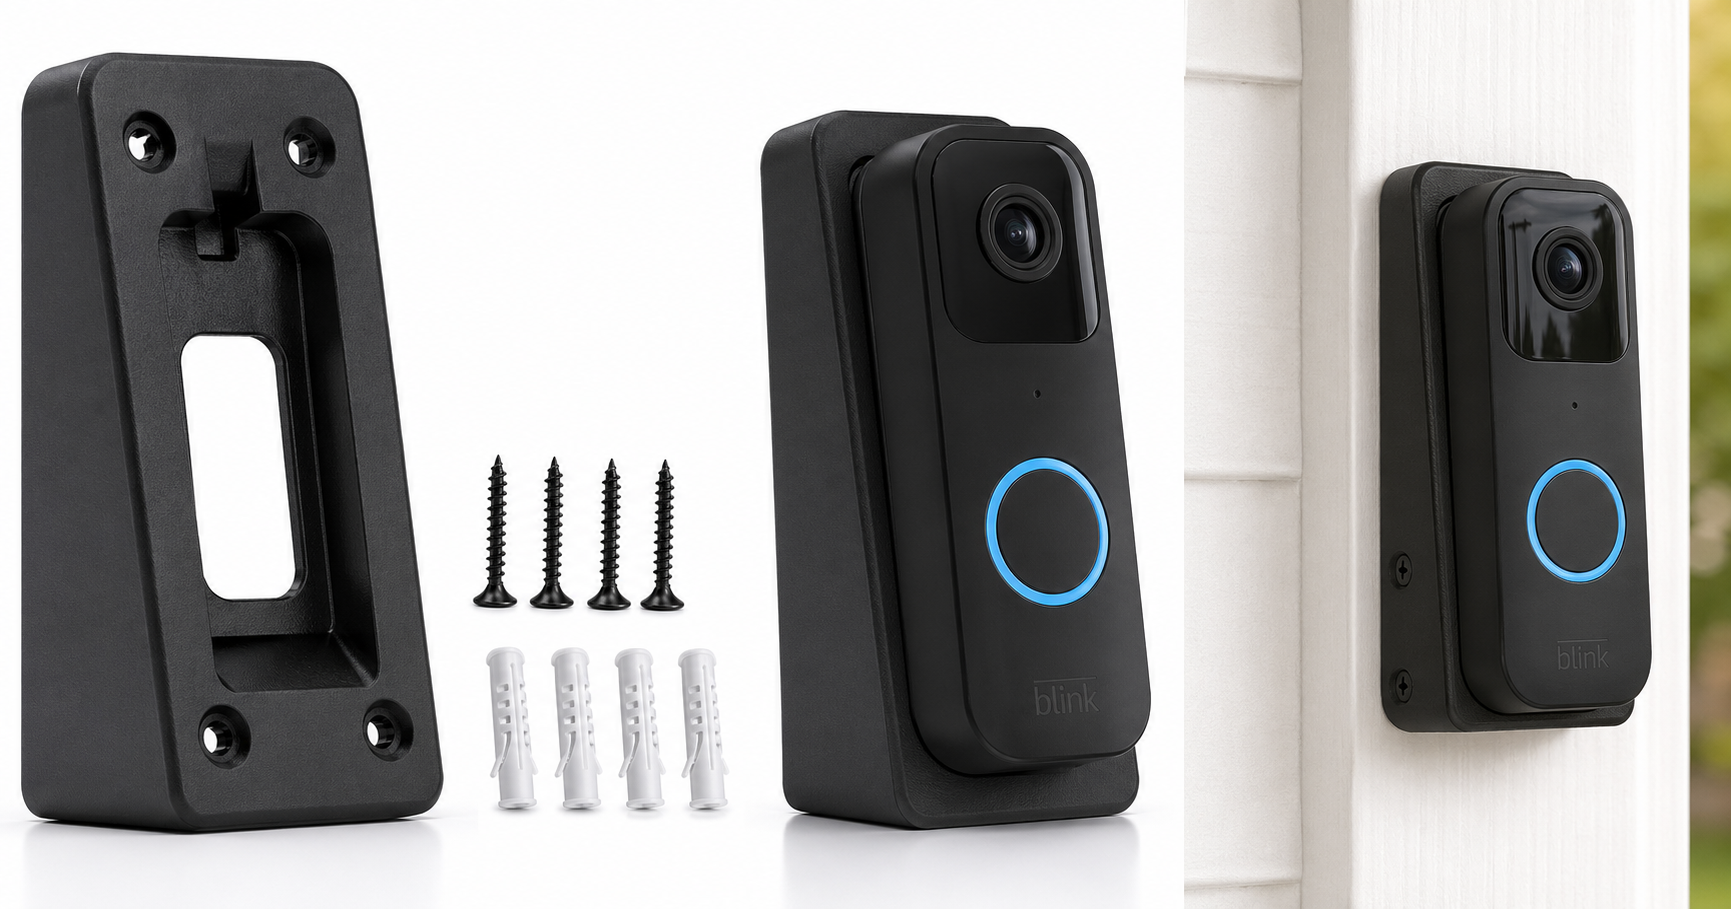
While exact contents can vary slightly, a typical package for the All-new Blink Video Doorbell Wedge Mount – Black usually includes:
- The wedge mount bracket (angled spacer)
- Mounting screws
- Wall anchors (for certain surfaces)
- Basic installation instructions
Compatibility and requirements
This wedge mount is designed specifically for the All-new Blink Video Doorbell form factor. It attaches between the doorframe or wall and the doorbell unit, so you’ll need:
- A compatible Blink video doorbell
- A relatively flat mounting surface (wood, siding, masonry, or trim)
- A screwdriver or drill suitable for your wall material
Installation steps (typical)
-
Choose the mounting location
Decide where on the doorframe or wall your Blink doorbell should sit. Consider the height, distance from the door handle, and your Wi-Fi signal strength. -
Position the wedge
Hold the wedge mount against the surface with the thicker side oriented in the direction you want the camera to tilt (left, right, or downward, depending on your entry layout). -
Mark and drill pilot holes
Use a pencil to mark mounting points through the wedge’s screw holes. Drill small pilot holes if needed, especially in wood or masonry. -
Attach the wedge
Secure the wedge mount to the wall or doorframe using the supplied screws and any necessary wall anchors. Ensure it sits firmly without wobble. -
Mount the Blink video doorbell
Align the Blink doorbell with the wedge, then fasten it using the designated attachment points. Make sure the doorbell seats cleanly against the wedge and that the angle is correct before tightening fully. -
Adjust and test the viewing angle
Open the Blink app and view the live camera feed. Verify that the wedge has corrected any previous blind spots—such as seeing more of a visitor’s face, capturing packages on the ground, or pointing slightly toward a walkway.
The entire setup usually takes only a few extra minutes beyond the standard Blink doorbell installation.
Daily Usage
Once installed, the All-new Blink Video Doorbell Wedge Mount becomes essentially invisible in day-to-day use. It doesn’t require any ongoing interaction or maintenance beyond the doorbell itself.
In daily use, its main value is improved framing:
- Better face visibility: The angled mount can help ensure that visitors’ faces are centered rather than cut off, especially when the doorbell is installed on narrow trim or at a less-than-ideal height.
- Package coverage: Tilting the doorbell slightly downward can bring packages on the doorstep into view, making it easier to confirm deliveries.
- Entryway context: Side-to-side angle adjustments help include more of a walkway, driveway, or gate in the frame if your doorframe is set back or off to one side.
The wedge itself doesn’t change the user interface, notifications, or app behavior of the Blink system—it is purely a physical positioning enhancement.
Performance & Reliability
Stability and build quality
The wedge mount is typically made from rigid plastic designed to match the look of the Blink doorbell. In normal use:
- It should feel solid once installed, with no rattling or flexing when the door closes nearby.
- The finish and color (black) are chosen to blend with the doorbell and many dark doorframes or trim styles.
Provided the screws are tightened securely and the surface is appropriate, the bracket should remain stable over time, even in areas with frequent door traffic.
Weather resistance
Because this mount is intended for outdoor use along with the Blink video doorbell, it’s typically built to handle:
- Standard outdoor temperature ranges
- Occasional rain or moisture
- Sun exposure
As with many plastic exterior accessories, very long-term exposure to harsh environments (strong UV, heavy storms, or salty coastal air) can eventually cause some wear or discoloration, but for most residential settings it should be satisfactory.
Impact on camera performance
The wedge mount itself doesn’t affect image quality, audio, or motion detection algorithms. However, by improving the camera’s angle, it can indirectly enhance overall performance:
- Motion detection can be more accurate if the field of view captures more relevant movement areas.
- Night vision may be cleaner if the angle reduces glare from nearby walls or bright lights.
What Works Well
- Improved viewing angle: The core benefit is the ability to tilt the doorbell so you can see more of what matters—faces, packages, and the approach to your front door.
- Simple, low-profile design: The wedge is compact and unobtrusive, staying close to the doorframe without drawing much attention.
- Straightforward installation: For anyone comfortable installing a doorbell, adding the wedge is a minor extra step involving basic tools.
- Color match with Blink doorbell: The black finish helps the mount visually blend with the doorbell and many dark exterior trims.
- Better fit for tricky doorframes: Ideal for doors that are recessed, adjacent to walls, or mounted at angles that make a flat bracket less effective.
What Could Be Improved
- Fixed angle limitation: Many wedge mounts offer a single fixed angle. If your doorway geometry is unusual, you might wish for more granular adjustment or an adjustable multi-angle design.
- Added thickness on narrow trim: On very narrow doorframes, the extra thickness of the wedge can make space tighter next to storm doors or screen doors.
- Surface compatibility clarity: Clearer guidance in documentation about ideal surfaces (e.g., brick, vinyl siding, metal frames) and the best installation method for each could help first-time installers.
- Limited use beyond Blink: The mount is tailored for the All-new Blink Video Doorbell, which is a positive for fit but means it’s not particularly versatile for other brands or form factors.
Overall Impression
For Blink video doorbell owners whose current mounting location doesn’t provide a perfect view, the All-new Blink Video Doorbell Wedge Mount – Black is a practical, relatively inexpensive way to solve framing issues without relocating wiring or drilling new holes elsewhere.
It doesn’t add smart features or change how the doorbell operates, but it enhances the usefulness of what you already own by positioning the camera where it can do its best work. If your entryway layout is straightforward and you already get a clear, centered view, this accessory might be optional. However, if you find that visitors’ faces are cut off, packages disappear just below the frame, or your walkway is only partially visible, this wedge mount is a simple, purpose-built upgrade worth considering around $7.99.
For most Blink users dealing with less-than-ideal mounting angles, this accessory is a sensible, low-effort way to get more value out of their video doorbell.